Ingredients in Cheese Bread
- Buttermilk: Liquid activates the yeast. For soft, flavorful, and chewy cheese bread, use a combination of buttermilk and water. Nondairy, whole, or low fat milks work too, but buttermilk produces phenomenal flavor and texture.
- Water: Although you could use all milk as the liquid in this dough, I preferred a mix of water and buttermilk. All milk made this taste more like an overly soft dessert bread.
- Yeast: You can use active dry yeast or instant yeast. If using active dry yeast, the rise times will be a little longer. I recommend Platinum Yeast from Red Star, which is an instant yeast that is blended with natural dough improvers.
- Sugar: Sugar feeds the yeast, increases its activity, and tenderizes the dough.
- Melted Butter: Butter promises a soft and flavorful bread. Use melted butter. I found that room temperature butter produced a cakey-er and less flavorful end product.
- Egg: 1 egg provides structure and flavor.
- Salt: Bread would be seriously lacking flavor without salt!
- Garlic Powder: Garlic powder adds incredible flavor to the dough AND to the topping. If using fresh garlic, use 1 finely minced clove in the dough and 1 teaspoon minced garlic in the topping.
- Bread Flour: Higher protein flour like bread flour is best for this bread recipe because of its strong gluten formation and high rise. All-purpose flour will yield a flimsy bread.
- Cheddar Cheese: I recommend cheddar cheese, but you can use another harder cheese such as pepper jack, gouda, or colby cheese. Avoid very soft cheeses. For best taste and texture, shred the cheese off the block yourself with a cheese grater.
How to Shape & Assemble Cheese Bread
Remember Nutella babka and cinnamon crunch bread? We’re doing the same thing here. Pictures and explanations can only do so much, so make sure you watch the video tutorial above before assembling.
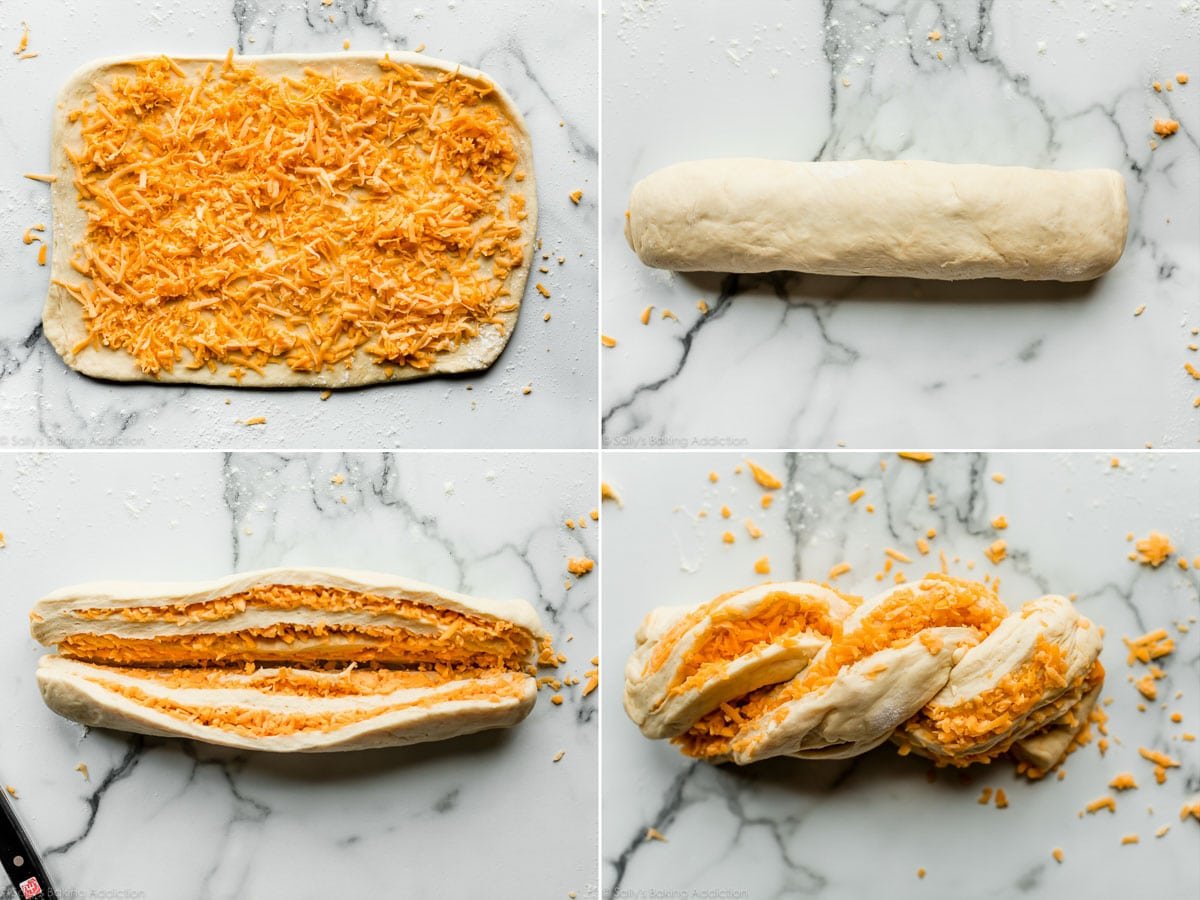
- Punch down the risen dough. Roll out into a 9×15-inch rectangle.
- Sprinkle cheese all over the top.
- Tightly roll the dough into a 15-inch log. Place the log on its seam.
- Using a sharp knife, cut the log in half lengthwise.
- Criss-cross one half, cut side down, on top of the other half– forming an X. Tightly twist the two together.
- Pinch the outer edges to seal as best you can.
By the way, there’s 2 cups of cheese stuffed inside this bread. 🙂
After it’s shaped, loosely cover the bread and let it rest for about 30 minutes. During this time, preheat the oven. Right before baking, brush the shaped dough with melted butter, garlic powder, and chopped parsley. Chopped basil would be excellent, too!

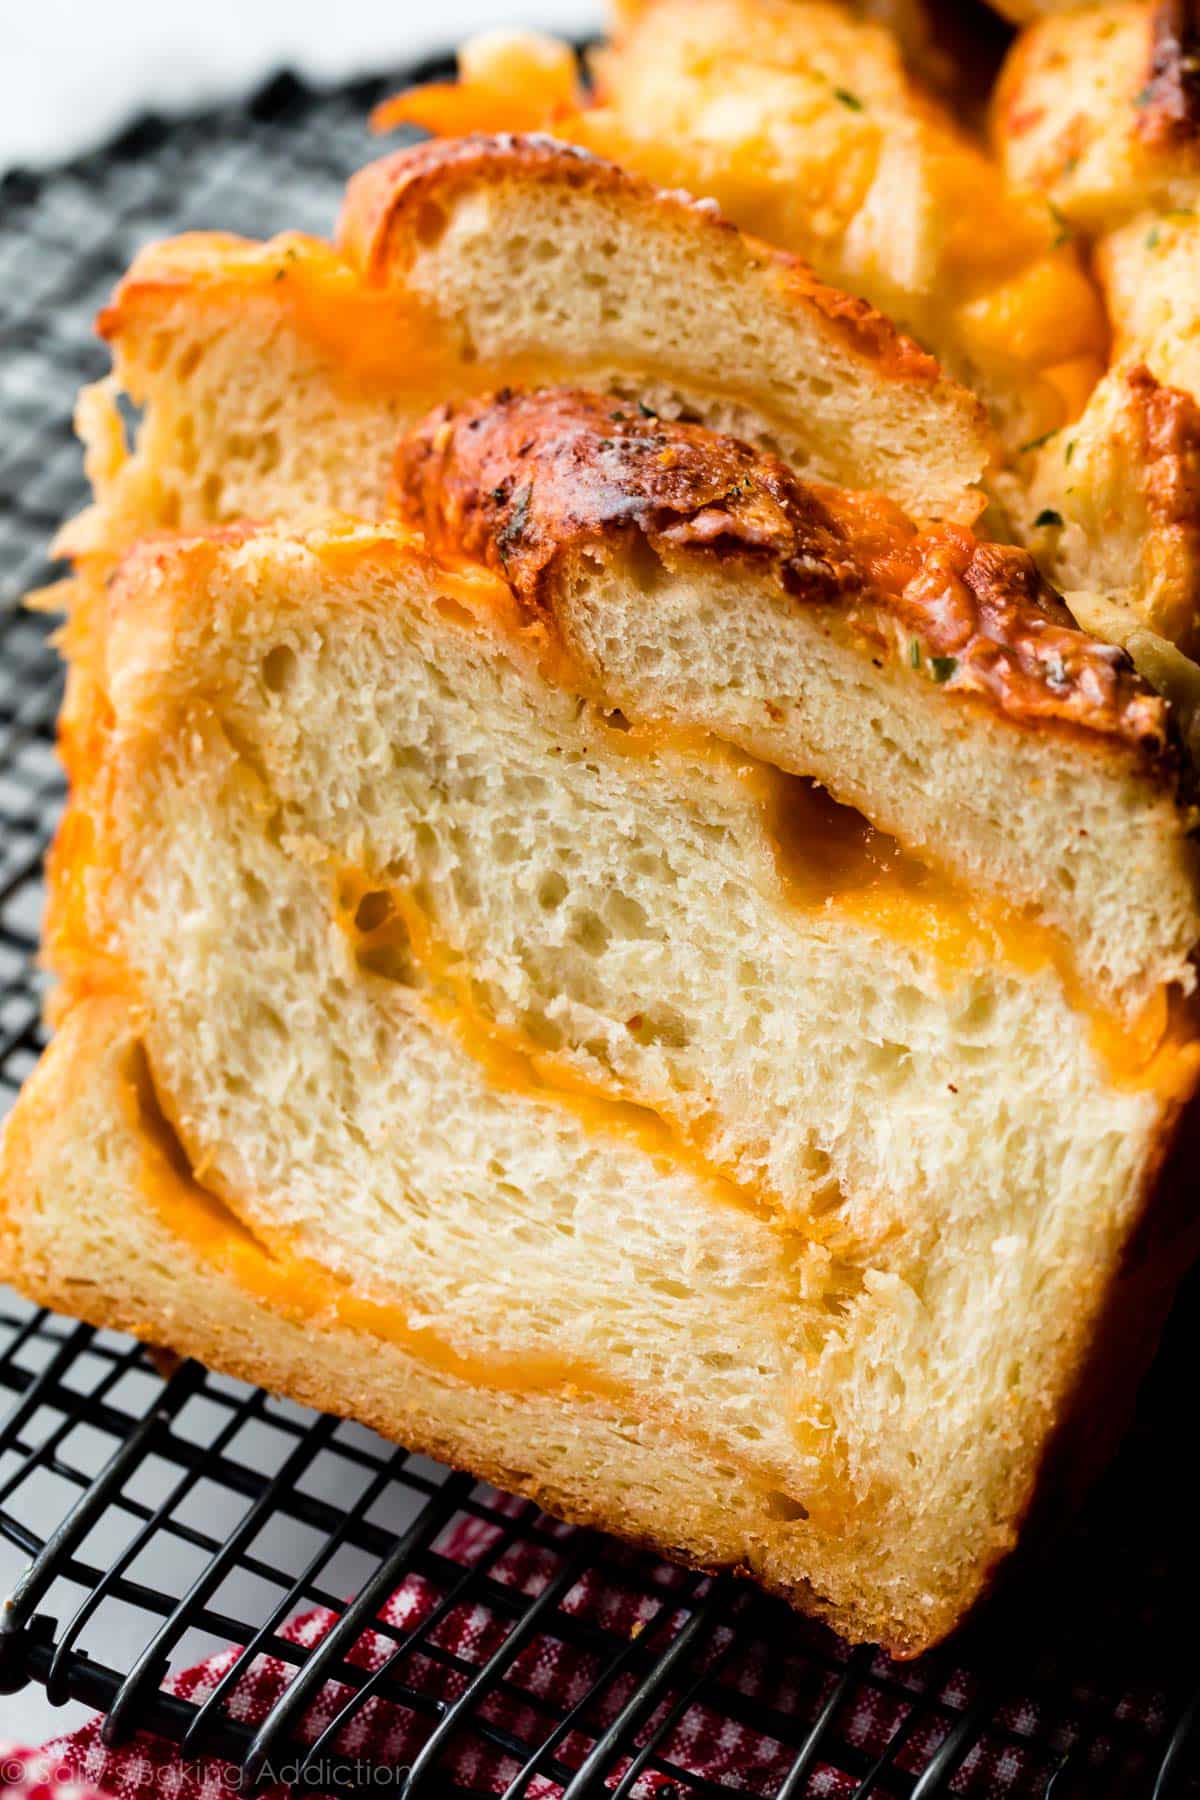
There is no sight more beautiful. No smell more heavenly. No taste more paralleled!
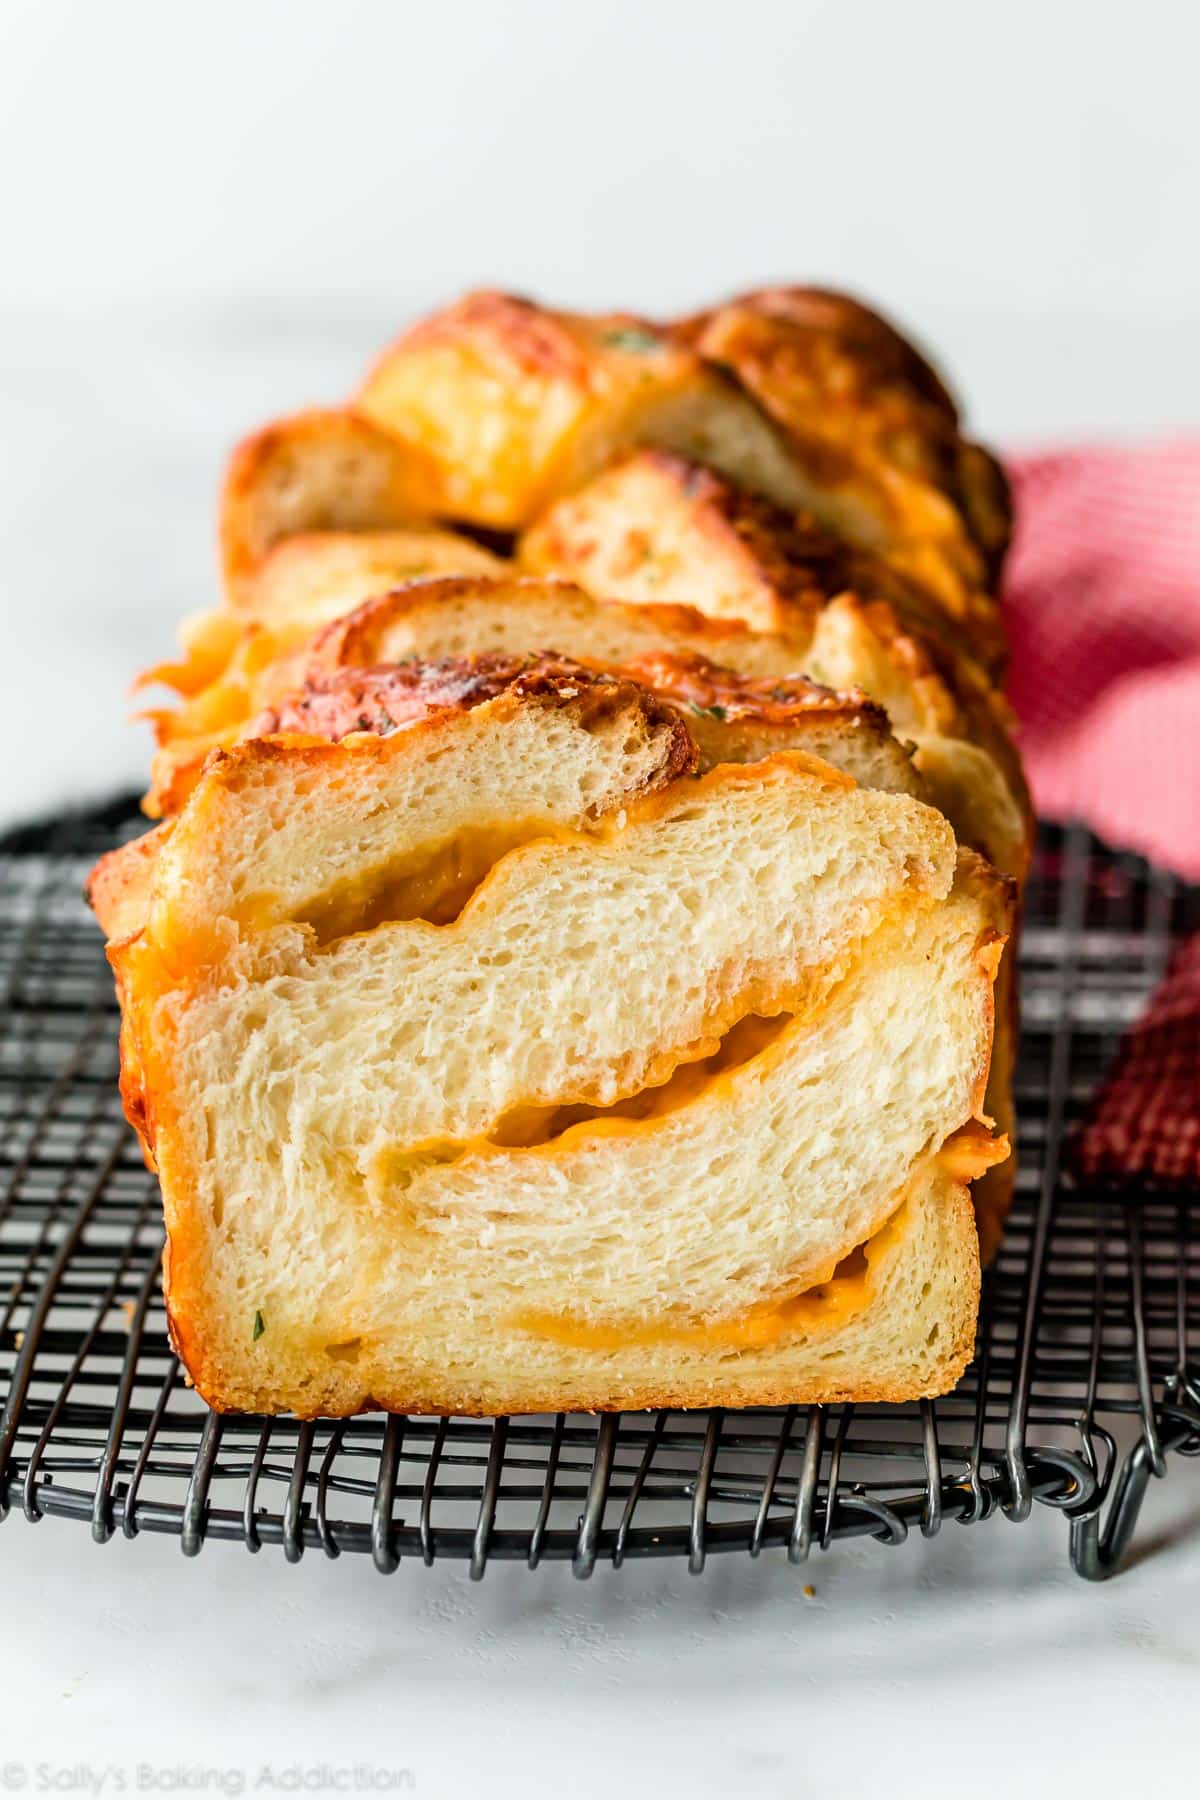
The best part, besides that first cheesy bite, is slicing into the loaf to reveal all those swirls of real melted cheese. Like I said, this is obviously the greatest loaf of all time.
Ingredients
- 1/2 cup (120ml) buttermilk, warmed to about 110°F
- 1/3 cup (80ml) water, warmed to about 110°F
- 2 and 1/4 teaspoons Platinum Yeast from Red Star (1 standard packet)
- 2 Tablespoons (25g) granulated sugar
- 5 Tablespoons (71g) unsalted butter, melted + slightly cooled
- 1 large egg, at room temperature
- 1 teaspoon salt
- 3/4 teaspoon garlic powder
- 3 cups (390g) bread flour (spooned & leveled), plus more as needed and for hands/work surface*
- 2 cups (250g; 8 ounces) shredded cheddar cheese (see note)
Topping
- 2 Tablespoons (28g) unsalted butter, melted
- 2 teaspoons chopped fresh parsley (or your favorite dried or fresh herb)*
- 1/4 teaspoon garlic powder
Instructions
- Prepare the dough: Whisk the warm buttermilk, warm water, yeast, and sugar together in the bowl of your stand mixer fitted with a dough hook or paddle attachment. Cover and allow to sit for 5 minutes.
- Add the butter, egg, salt, garlic powder, and 1 cup flour. Beat on low speed for 30 seconds, scrape down the sides of the bowl with a silicone spatula, then add the remaining flour. Beat on low speed until the dough comes together and pulls away from the sides of the bowl, about 2 minutes. *If you do not own a mixer, you can mix this dough with a large wooden spoon or silicone spatula. It will take a bit of arm muscle!*
- Knead the dough: Keep the dough in the mixer and beat for an additional 5 full minutes, or knead by hand on a lightly floured surface for 5 full minutes. (If you’re new to bread-baking, my How to Knead Dough video tutorial can help here.) If the dough becomes too sticky during the kneading process, sprinkle 1 teaspoon of flour at a time on the dough or on the work surface/in the bowl to make a soft, slightly tacky dough. Do not add more flour than you need because you do not want a dry dough. After kneading, the dough should still feel a little soft. Poke it with your finger—if it slowly bounces back, your dough is ready to rise. You can also do a “windowpane test” to see if your dough has been kneaded long enough: tear off a small (roughly golfball-size) piece of dough and gently stretch it out until it’s thin enough for light to pass through it. Hold it up to a window or light. Does light pass through the stretched dough without the dough tearing first? If so, your dough has been kneaded long enough and is ready to rise. If not, keep kneading until it passes the windowpane test.
- 1st Rise: Lightly grease a large bowl with oil or nonstick spray. Place the dough in the bowl, turning it to coat all sides in the oil. Cover the bowl with aluminum foil, plastic wrap, or a clean kitchen towel. Allow the dough to rise in a relatively warm environment for 1.5-2 hours or until double in size. (I always let it rise on the counter. Takes about 2 hours. For a tiny reduction in rise time, see my answer to Where Should Dough Rise? in my Baking with Yeast Guide.)
- Grease a 9×5-inch loaf pan.
- Shape the bread: Punch down the dough to release the air. Place dough on a lightly floured work surface and with a floured rolling pin, roll the dough out into a 9×15-inch rectangle (approximately). Sprinkle cheese all over the top, leaving a 1/2 inch border uncovered.
- Watch the video above to see exactly how I do this step. Tightly roll the dough into a 15-inch log. Place the log on its seam. Using a sharp knife, cut the log in half lengthwise. I find a serrated knife works best. Criss-cross one half, cut side down, on top of the other half—forming an X. Tightly twist the two together. Pinch the outer edges to seal as best you can. If you have any leftover cheese, cut a few small squares and tuck into the dough as shown in the video above. This is optional and simply for extra cheesy pockets! Place in prepared loaf pan and cover with aluminum foil, plastic wrap, or a clean kitchen towel. (This step can get a little messy.)
- Allow the covered loaf to rest for 30 minutes. It will slightly rise during this time.
- Adjust the oven rack to the lower third position. Place a baking sheet on the lower rack to catch any cheese or butter that may drip down. Preheat the oven to 350°F (177°C).
- Topping: Whisk the melted butter, herbs, and garlic powder together. Drizzle or brush on top of dough.
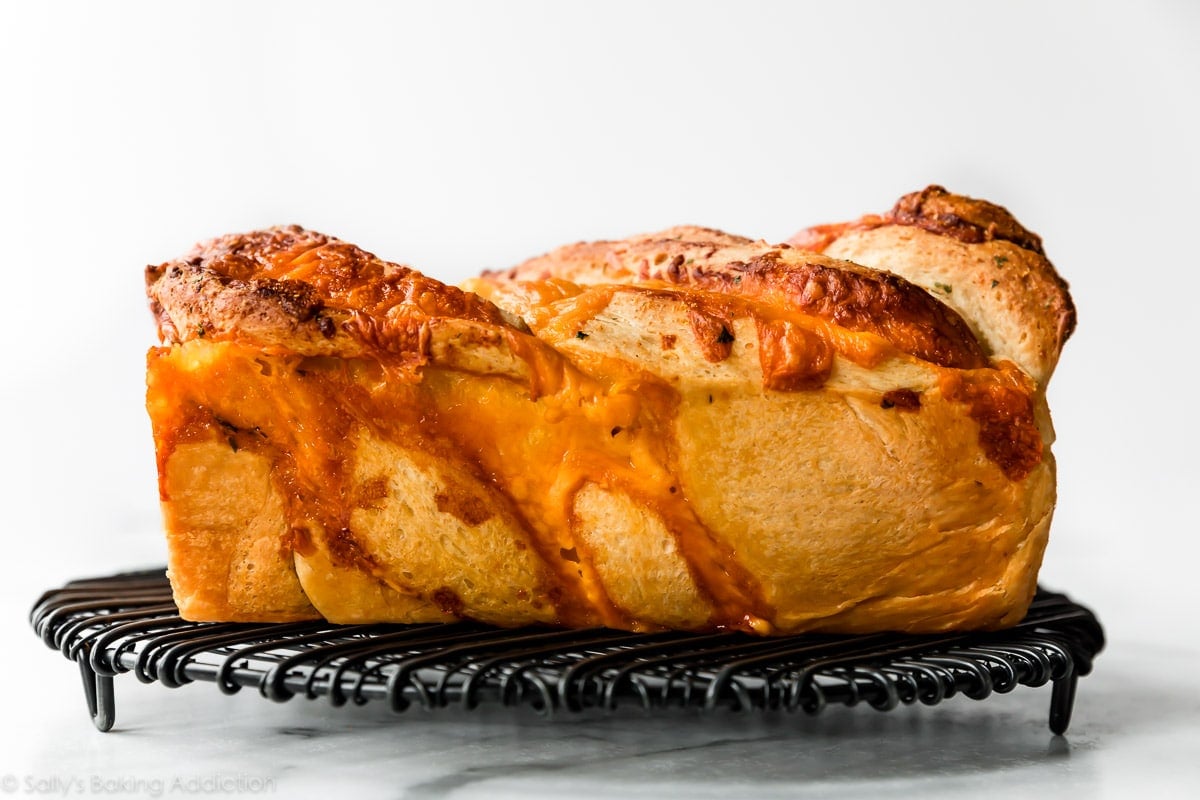
- Bake: Bake until golden brown and, when gently tapped, the top of the loaf sounds hollow, about 45-55 minutes. If you find the top of the loaf is browning too quickly as it bakes, tent with aluminum foil. (I usually place foil on top after about 25 minutes.) Remove bread the oven and place on a wire rack. Cool for 10 minutes in the pan, then remove from the pan and cool loaf on the wire rack.
- Slice and serve. Cover and store leftovers at room temperature for 2 days or in the refrigerator for up to 1 week. Leftover slices taste delicious when warmed in the microwave for 10 seconds.